Introduction to Planting Palm Trees
Adding palm trees to your landscape instantly creates a tropical, resort-like atmosphere that transforms any property. Whether you’re planting a majestic queen palm, a compact pygmy date palm, or a hardy windmill palm, proper planting technique is essential for establishing healthy, long-lived trees. This comprehensive guide covers everything you need to know about how to plant a palm tree successfully.
Palm trees differ from other trees in their root structure and growth habits. Unlike typical trees with spreading root systems, palms have fibrous, adventitious roots that grow directly from the trunk base. Understanding these differences is key to proper planting technique.
When to Plant Palm Trees
Best Seasons
The optimal time to plant palm trees depends on your climate:
- Warm climates (Zones 9-11): Plant in spring through early fall when soil is warm
- Temperate climates (Zones 7-8): Late spring after last frost gives palms time to establish before winter
- Cold climates: Plant cold-hardy varieties in late spring or early summer
Avoid These Times
- During extreme heat (above 95°F/35°C)
- During cold snaps or frost periods
- During the hottest part of summer
Choosing the Right Palm Tree
Consider Your Climate
Before purchasing, ensure the palm species is suitable for your USDA hardiness zone:
- Zones 10-11: Coconut palm, royal palm, foxtail palm
- Zones 9: Queen palm, Kentia palm, Christmas palm
- Zones 8: Windmill palm, pindo palm, Mediterranean fan palm
- Zones 7: Needle palm, dwarf palmetto, windmill palm
Size Considerations
- Small palms (under 15 feet): Pygmy date palm, parlor palm, cat palm
- Medium palms (15-30 feet): Mediterranean fan palm, pindo palm, sago palm
- Large palms (30+ feet): Queen palm, royal palm, coconut palm
Site Selection and Preparation
Sun Requirements
Most palm trees prefer full sun, but some tolerate or prefer shade:
- Full sun: Queen palm, royal palm, coconut palm, date palm
- Part shade: Kentia palm, areca palm, parlor palm
- Shade tolerant: Rhapis palm, cat palm, bamboo palm
Drainage Is Critical
Palms require well-draining soil. Test drainage by digging a 12-inch hole and filling it with water:
- Drains in 1-2 hours: Excellent drainage
- Drains in 2-4 hours: Good drainage
- Takes longer than 4 hours: Poor drainage—improve before planting
Space Requirements
Consider both above-ground and below-ground space:
- Allow room for mature canopy spread
- Plant at least 5-10 feet from structures
- Consider proximity to power lines and underground utilities
- Space multiple palms according to mature width
Step-by-Step Planting Guide
Step 1: Gather Your Materials
- Palm tree (container-grown or field-dug)
- Shovel
- Organic compost or planting mix
- Mulch
- Stakes and ties (for larger palms)
- Water source
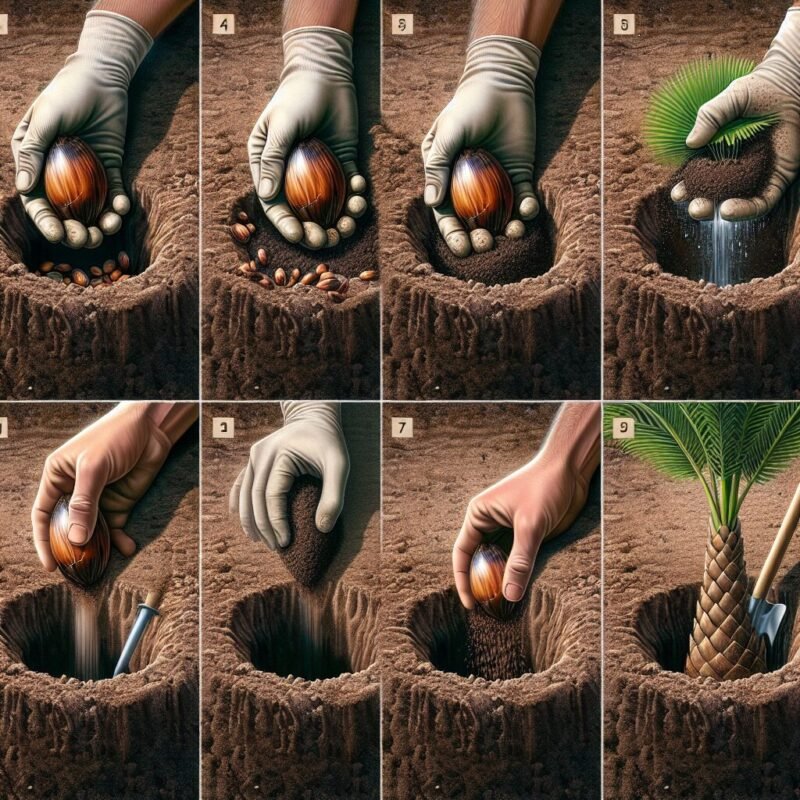
Step 2: Dig the Hole
Proper hole preparation is crucial:
- Width: Dig 2-3 times wider than the root ball
- Depth: Dig only as deep as the root ball—never deeper
- Shape: Rough up the sides to prevent root circling
- Check: The palm should sit at the same depth it was in the container
Important: Planting too deep is one of the most common palm planting mistakes and can lead to decline or death.
Step 3: Prepare the Palm
- Water the palm thoroughly 24 hours before planting
- Carefully remove from container without damaging roots
- If root-bound, gently loosen outer roots
- Do not remove soil from around the roots
- Handle by the root ball, not the trunk
Step 4: Position the Palm
- Place the palm in the center of the hole
- Check that the root ball sits at or slightly above grade
- Orient the palm’s best side toward the primary viewing angle
- Ensure the tree is straight from all angles
Step 5: Backfill the Hole
- Use the native soil removed from the hole
- Mix in 25-30% organic compost if soil is poor
- Backfill halfway, then water to settle soil
- Continue backfilling, firming soil gently as you go
- Create a soil berm around the edge to hold water
Note: Do not amend soil too heavily—roots need to adapt to native soil.
Step 6: Water Thoroughly
- Water deeply immediately after planting
- Ensure water penetrates the entire root ball
- Check for settling and add soil if needed
- Water should reach the bottom of the root ball
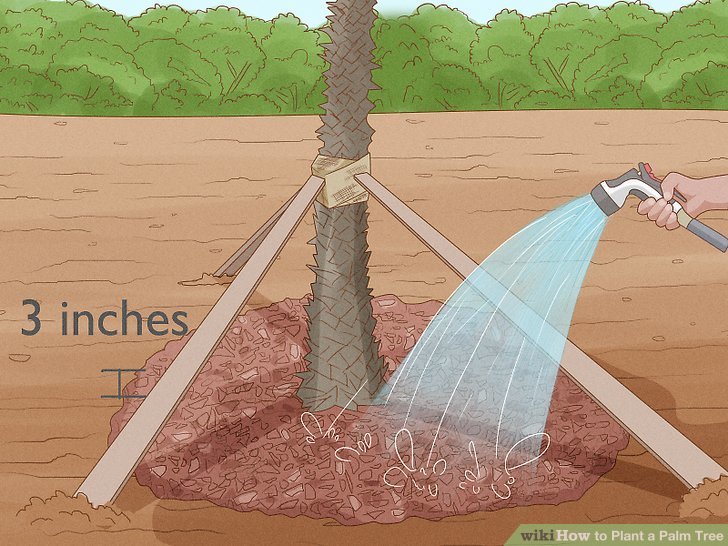
Step 7: Apply Mulch
- Apply 2-4 inches of organic mulch
- Keep mulch 6 inches away from the trunk
- Extend mulch to the drip line
- Refresh mulch as needed
Step 8: Stake If Necessary
- Small palms usually don’t need staking
- Larger palms or windy sites may require support
- Use 2-3 stakes placed outside the root ball
- Use soft ties that won’t damage the trunk
- Remove stakes after 6-12 months
Post-Planting Care
Watering Schedule
Proper watering is critical during establishment:
First 2 Weeks
- Water daily for the first week
- Every other day for the second week
- Keep soil consistently moist but not waterlogged
Weeks 3-8
- Water 2-3 times per week
- Adjust based on temperature and rainfall
- Water deeply each time
Months 3-12
- Water once or twice weekly
- Reduce frequency as roots establish
- Established palms are drought tolerant
Fertilization
- Wait 6-8 weeks before fertilizing
- Use a slow-release palm fertilizer (8-2-12 or similar)
- Apply according to package directions
- Spread fertilizer to the drip line, not against trunk
- Fertilize 3-4 times per year during growing season
What NOT to Do After Planting
- Don’t remove green fronds: The palm needs them for energy
- Don’t overwater: More palms die from overwatering than underwatering
- Don’t bury the trunk: Keep the base exposed to air
- Don’t prune heavily: Only remove completely brown fronds
- Don’t fertilize immediately: Wait for roots to establish
Container vs. In-Ground Planting
Planting in Containers
- Choose a container 2-4 inches larger than root ball
- Use a well-draining potting mix
- Ensure adequate drainage holes
- Water more frequently than in-ground palms
- Fertilize monthly during growing season
- Repot every 2-3 years
Best Container Palms
- Pygmy date palm
- Parlor palm
- Kentia palm
- Cat palm
- Sago palm
Transplanting Established Palms
Moving an established palm requires extra care:
Timing
- Best during warm months when palms are actively growing
- Avoid during winter dormancy
Root Pruning
- Root prune 2-3 months before moving
- Cut around the drip line with a sharp spade
- Encourages new root development within root ball
Post-Transplant Care
- Keep soil consistently moist
- Apply anti-transpirant spray to reduce water loss
- Provide temporary shade in hot climates
- Expect some frond loss—this is normal
Troubleshooting Common Problems
Yellowing Leaves After Planting
Cause: Transplant shock or overwatering
Solution: Ensure proper drainage; yellowing should stop as roots establish
Wilting or Drooping Fronds
Cause: Underwatering or root damage
Solution: Increase watering frequency; ensure soil is moist to root depth
Brown Tips on Fronds
Cause: Low humidity, over-fertilization, or salt buildup
Solution: Flush soil with water; reduce fertilizer; increase humidity
Slow Growth
Cause: Insufficient water, light, or nutrients
Solution: Evaluate growing conditions; fertilize appropriately
Quick Reference: Planting Checklist
| Task | Timing |
|---|---|
| Choose appropriate species | Before purchase |
| Test soil drainage | Before digging |
| Dig hole 2-3x root ball width | Planting day |
| Plant at correct depth | Planting day |
| Water thoroughly | Immediately after planting |
| Apply mulch | After watering |
| Begin fertilizing | 6-8 weeks after planting |
| Remove stakes | 6-12 months after planting |
Conclusion
Learning how to plant a palm tree properly sets the foundation for decades of enjoyment. The keys to success are choosing the right species for your climate, planting at the correct depth, providing adequate water during establishment, and avoiding common mistakes like overwatering or premature fertilization.
Remember that palms are uniquely different from other trees—their fibrous root systems and single growing point require specific care. By following this guide and giving your new palm the right start, you’ll be rewarded with a beautiful, healthy specimen that enhances your landscape for years to come.
Whether you’re creating a tropical oasis, adding a focal point to your garden, or planting a row of palms for privacy, proper planting technique is the first step toward success. Take your time, follow each step carefully, and enjoy watching your palm thrive in its new home.
This article is for educational purposes. Always check local growing conditions and consult with local nurseries or extension services for region-specific recommendations.