Introduction to Juniper Propagation
Junipers are versatile evergreen shrubs and trees prized for their hardiness, drought tolerance, and year-round foliage. Whether you want to multiply your favorite specimen, create a hedge inexpensively, or grow junipers for bonsai, propagation is a rewarding skill to master.
There are three main methods for propagating juniper: stem cuttings, seeds, and layering. Each method has its advantages, and the best choice depends on your goals, patience level, and the specific juniper variety you’re working with.
Method 1: Propagating Juniper from Cuttings (Recommended)
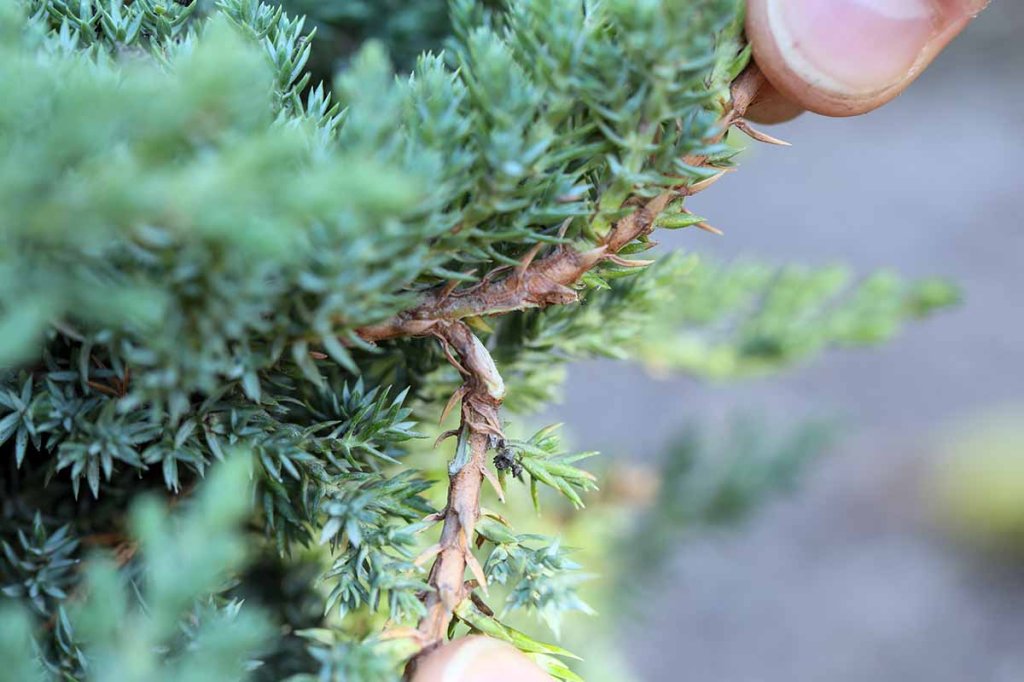
Stem cuttings are the most popular and reliable method for propagating junipers. This technique produces genetically identical plants and is faster than growing from seed. Success rates of 60-90% are achievable with proper technique.
Best Time for Cuttings
Timing significantly affects success rates:
- Late summer to early fall (August-October): Best time for semi-hardwood cuttings. Stems have matured but are not yet dormant.
- Late winter to early spring (February-April): Good for hardwood cuttings from dormant plants.
- Avoid: Mid-summer heat and mid-winter freezes
Supplies Needed
- Sharp, clean pruning shears or scissors
- Rooting hormone (powder or gel, optional but recommended)
- Propagation medium (perlite, vermiculite, or a 50/50 peat-perlite mix)
- Small pots or propagation trays
- Clear plastic bags or a propagation dome
- Rooting hormone (optional but improves success)
- Isopropyl alcohol for sterilizing tools
Step-by-Step Cutting Process
Step 1: Select the Parent Plant
Choose a healthy, disease-free juniper with desirable characteristics. Avoid plants under stress from drought, disease, or pests. The parent plant should be mature (at least 2-3 years old).
Step 2: Take the Cuttings
- Cut 4-6 inch sections from the tips of healthy branches
- Make cuts just below a node (where leaves/needles attach)
- Choose semi-hardwood growth—stems that bend but don’t snap
- Take cuttings in early morning when plants are fully hydrated
- Place cuttings immediately in a plastic bag with moist paper towel
Step 3: Prepare the Cuttings
- Remove the lower 1-2 inches of foliage (needles/scales)
- Leave the top 2-3 inches of foliage intact
- Wound the base slightly by scraping a thin strip of bark (about 1/2 inch)
- Wounding encourages root development
- Dip the cut end in rooting hormone (shake off excess)
Step 4: Plant the Cuttings
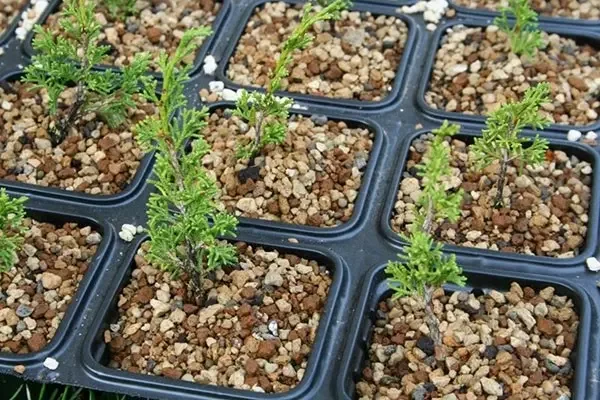
- Fill pots with propagation medium and moisten thoroughly
- Make a hole with a pencil or dibble
- Insert cutting 1-2 inches deep
- Firm the medium around the cutting
- Space cuttings 2-3 inches apart if using trays
Step 5: Create Humidity
- Place pots in a clear plastic bag or under a propagation dome
- Support the plastic so it doesn’t touch the foliage
- Maintain high humidity (80-90%)
- Ventilate occasionally to prevent fungal problems
Step 6: Provide Proper Conditions
- Light: Bright, indirect light; avoid direct sun
- Temperature: 65-75°F (18-24°C)
- Moisture: Keep medium moist but not waterlogged
Rooting Timeline
Juniper cuttings are slow to root:
- 4-8 weeks: Initial callus formation
- 8-16 weeks: Root development begins
- 4-6 months: Sufficient roots for transplanting
- 1-2 years: Ready for landscape planting
Signs of Success
- New growth appearing on the cutting
- Resistance when gently tugged (roots forming)
- Fresh, green foliage
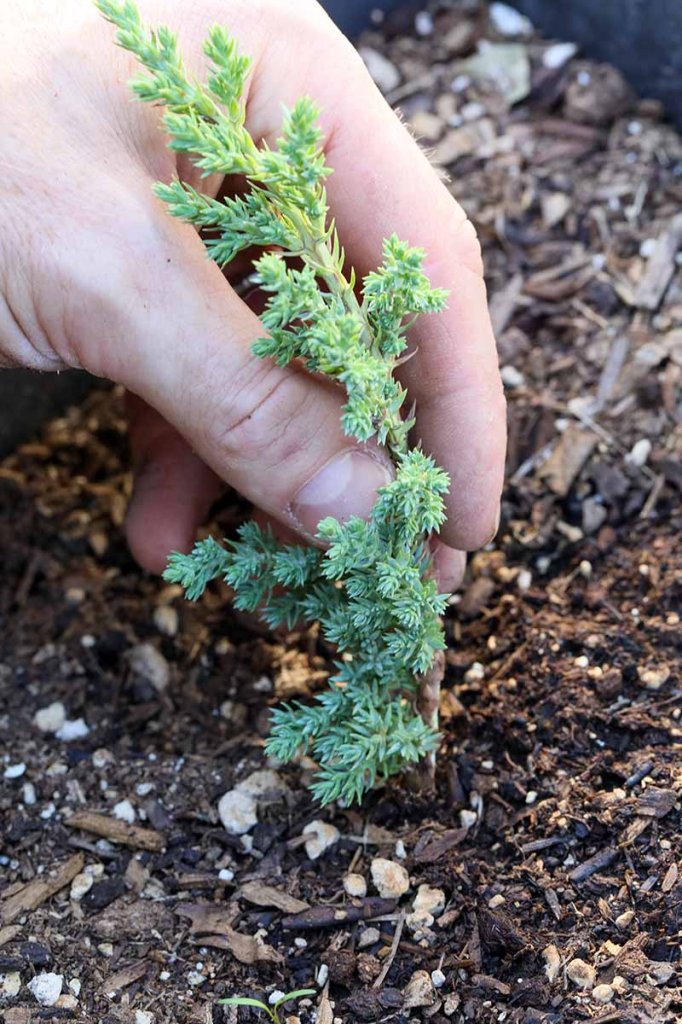
Transplanting Rooted Cuttings
- Wait until roots are 1-2 inches long
- Gradually acclimate to lower humidity over 2-3 weeks
- Transplant to small pots with well-draining potting mix
- Keep in protected location for first year
- Plant in landscape after 1-2 years of growth
Method 2: Propagating Juniper from Seeds
Growing juniper from seed is possible but challenging and time-consuming. This method is primarily used for species junipers rather than cultivars, as seeds don’t produce exact clones.
Challenges of Seed Propagation
- Seeds have complex dormancy requirements
- Germination rates are often low (20-50%)
- Takes 2-5 years to produce landscape-ready plants
- Cultivars won’t come true from seed
Seed Collection and Preparation
- Collect berries: Harvest ripe blue-gray berries in fall
- Clean seeds: Remove fleshy pulp by soaking and rubbing
- Dry seeds: Allow to air dry for a few days
Stratification Process
Juniper seeds require cold stratification to break dormancy:
- Mix seeds with moist peat moss or sand
- Place in a sealed plastic bag
- Refrigerate at 34-41°F (1-5°C) for 3-4 months
- Check periodically for mold
Planting Seeds
- After stratification, plant seeds 1/4 inch deep in seed-starting mix
- Keep at 65-75°F (18-24°C)
- Maintain consistent moisture
- Germination may take 1-3 months
- Transplant seedlings when they have 2-3 sets of true leaves
Method 3: Propagating Juniper by Layering
Layering is a simple method where a branch roots while still attached to the parent plant. It’s especially useful for creeping and spreading juniper varieties.
Types of Layering
Simple Layering
- Select a low, flexible branch
- Wound the underside where it will contact soil
- Bend the branch to the ground
- Peg it down with a U-shaped wire
- Cover the wounded section with 2-3 inches of soil
- Keep the tip above ground
- Roots form in 6-12 months
- Sever from parent and transplant
Mound Layering (Stooling)
Best for upright juniper varieties:
- In spring, cut the plant back to 2-4 inches from ground
- New shoots will emerge
- When shoots reach 6 inches, mound soil halfway up
- Continue mounding as shoots grow
- By fall, shoots will have rooted
- Separate rooted shoots and replant
Factors Affecting Propagation Success
Juncture Species and Varieties
Some junipers propagate more easily than others:
- Easy to root: Creeping juniper (J. horizontalis), Shore juniper (J. conferta)
- Moderate: Chinese juniper (J. chinensis), Japanese garden juniper (J. procumbens)
- Difficult: Eastern red cedar (J. virginiana), Rocky Mountain juniper (J. scopulorum)
Environmental Factors
- Temperature: Consistent temperatures between 65-75°F optimize rooting
- Humidity: High humidity prevents cutting desiccation
- Light: Bright indirect light; avoid harsh direct sun
- Moisture: Medium should stay consistently moist but never waterlogged
Hormone Use
Rooting hormones significantly improve success rates:
- IBA (Indole-3-butyric acid): Most effective for junipers
- Strength: Use 1000-3000 ppm for semi-hardwood cuttings
- Application: Dip cut end immediately before planting
Common Problems and Solutions
Cuttings Wilt and Die
Causes: Low humidity, too much sun, insufficient watering
Solutions: Increase humidity, provide shade, check moisture levels
Black or Mushy Stems
Cause: Fungal rot from overwatering or poor drainage
Solutions: Improve drainage, reduce watering, apply fungicide
No Root Development
Causes: Wrong timing, wrong cutting type, insufficient time
Solutions: Try again in fall, ensure semi-hardwood cuttings, be patient
Cuttings Turn Brown
Cause: Desiccation or disease
Solutions: Maintain humidity, ensure sterile conditions, discard affected cuttings
Aftercare for New Plants
First Year Care
- Water: Keep soil consistently moist but not waterlogged
- Protection: Shield from extreme weather and harsh sun
- Fertilizer: Light application of balanced fertilizer in spring
- Winter: Protect from freezing in cold climates
Transplanting to Landscape
- Wait until plants have adequate root systems (1-2 years)
- Plant in spring or fall
- Choose a well-draining location with full sun to partial shade
- Water regularly during establishment
Propagation Timeline Summary
| Method | Time to Root | Success Rate | Difficulty |
|---|---|---|---|
| Semi-hardwood Cuttings | 2-4 months | 60-90% | Moderate |
| Hardwood Cuttings | 3-6 months | 40-70% | Easy |
| Seeds | 1-3 months germination | 20-50% | Difficult |
| Simple Layering | 6-12 months | 70-90% | Easy |
Conclusion
Propagating juniper requires patience but is achievable for gardeners of all skill levels. Stem cuttings remain the preferred method, offering the best balance of success rate, speed, and genetic consistency. Whether you’re expanding your landscape, creating gifts for fellow gardeners, or developing specimens for bonsai, mastering juniper propagation opens up exciting possibilities.
Remember that junipers are slow-growing by nature. While the propagation process takes months rather than weeks, the reward of growing your own plants from cuttings is well worth the wait. With proper technique, appropriate timing, and patient care, you can successfully multiply these beautiful evergreens for years of enjoyment.
This article is for educational purposes. Always follow local regulations regarding plant propagation and consult extension services for region-specific guidance.