There’s a moment—usually around week eight—when the tiniest whiff of pine-meets-citrus drifts up from your seed tray and you realize, “Holy aromatherapy, I actually did it.” Growing lavender from seed is part science experiment, part meditation retreat, and part stubborn refusal to pay $14 for a single plant at the garden center. The journey from dust-speck seed to a waist-high hedge humming with bees is slow, yes, but every stage comes with its own little victory dance. Understand what’s happening under the soil and inside those silver-green stems and you’ll trade frustration for anticipation—and end up with armfuls of fragrant wands to dry, distill, or just brag about on Instagram.
Understanding Lavender’s Growth Cycle and Key Varieties
Lavender is a perennial that thinks it’s an evergreen: it wants to live for a decade, shrug off drought, and smell good doing it. Most seed catalogs focus on English lavender (Lavandula angustifolia) because it’s the hardiest down to roughly USDA zone 5 and the essential-oil powerhouse behind those tiny bottles that cost more than a latte. Spanish and French types look sexier—topped with butterfly-shaped bracts—but they’re frost-tender drama queens. From sowing, expect at least 90–200 days before you see the first flower, and a full season (sometimes two) before the plant looks like anything other than a fuzzy green tarantula. Sunlight, alkaline soil, and the self-control to keep the watering can mostly holstered are the non-negotiables; everything else is just coaching.
Stage 1: Seed Starting & Germination
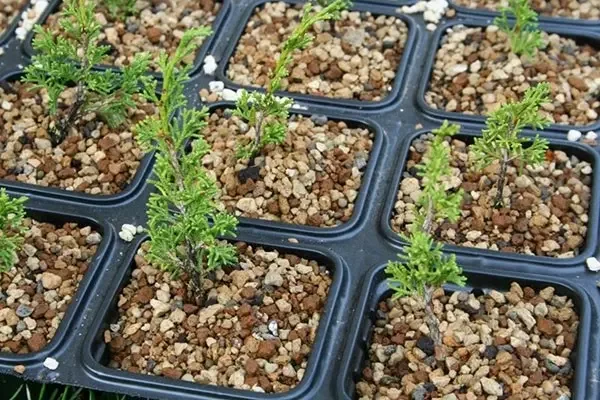
Lavender seeds are the introverts of the herb world: they need a cold, dark dormancy party before they’ll even consider socializing. Give them a four-week moist stratification in the fridge—mix the seed with a tablespoon of barely damp coffee-filter paper, seal in a zip-bag, and label it so your roommate doesn’t mistake it for experimental granola. Sow indoors 8–12 weeks before last frost on a surface of 50/50 seed compost and perlite; the seeds need light to germinate, so press them in but don’t bury. Aim for 70 °F (21 °C) soil temperature—an inexpensive heat mat beats the “on top of the cable box” hack—and keep humidity high with a clear dome until sprouts appear, usually 14–21 days. Damping off? That’s the fungal version of a bad breakup: prevent it by watering from the bottom, thinning ruthlessly, and running a small fan on low for airflow worthy of a California coastline.
Stage 2: Seedling Development & Care
When the second set of true leaves looks like tiny silver surfboards, bump the tray to its own personal sun—either a south-facing window two inches from the glass or a full-spectrum LED running 14 hours. Overwatering is the helicopter parent mistake; let the top half-inch dry until the tray feels as light as your hopes on a Monday morning. Feed once, and only once, before transplanting: a quarter-strength liquid kelp is like a multivitamin, not an all-you-can-eat buffet. Four weeks in, move seedlings to 3-inch pots so roots can stretch, and start “hardening off” by parking them outside in dappled shade for an hour, adding 30 minutes daily. Think of it as training for a 5 K—except the finish line is life in a gravelly border.
Stage 3: Transplanting to Final Location
Wait until nighttime lows stay above 45 °F (7 °C) and seedlings have 6–8 sturdy stems. Lavender’s motto is “sunshine, drainage, and personal space”—8 hours of direct light, soil pH 7.0–8.0, and 12–18 inches between plants so air can salsa through the foliage. If your ground holds water like a sponge, build a raised berm or mix in one-third horticultural grit the way the Royal Horticultural Society recommends. Tip the seedling out, cradle the root ball like a fragile ego, and plant so the crown sits just above soil level—burying it is a death sentence. Water once deeply, then slide a 1-inch layer of pea gravel underneath to act as both mulch and reflective heat pad.
Stage 4: Vegetative Growth & Establishment
Year one is all about the underground condo: roots dive, top growth crawls. Water every 5–7 days for the first month, then wean to a 10-day rhythm unless the top 2 inches resemble the Mojave. Skip high-nitrogen fertilizers—lavender treats them like cheap perfume: flashy at first, then collapse. Instead, scratch in a tablespoon of rock dust or a light dusting of bone meal if you must. Weed like you’re searching for lost keys; young lavender hates competition. When stems hit 4 inches, nip out the top set of leaves—think of it as giving the plant a pixie cut—to force side branching. By late summer you’ll have a silvery dome that looks appropriately Instagrammable.
Stage 5: Bud Formation & Flowering (Full Bloom)
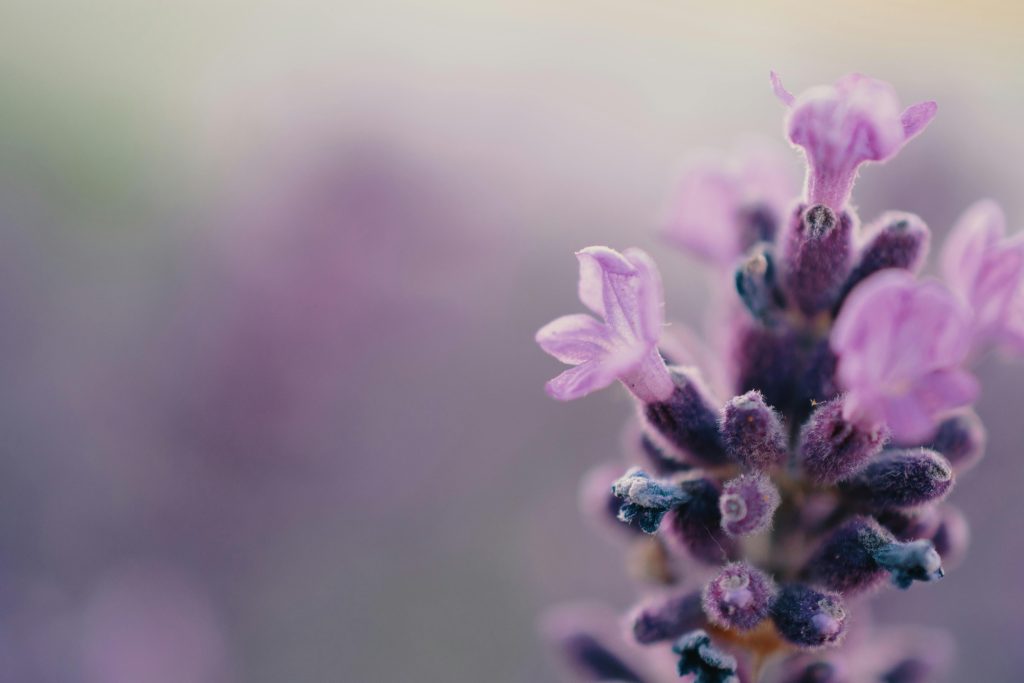
One fine morning you’ll spot tiny pale green grapes at every stem tip—those are future lavender candles. From seed, most L. angustifolia cultivars flower 90–110 days after transplant, peaking in late June to early July. Full sun equals more essential oil, so eight hours is the magic number. Harvest when the bottom two flowers on each spike have popped but the rest are still tight; that’s the sweet spot for color and fragrance. Snip stems in the cool of dawn, bundle with rubber bands (they contract like skinny jeans as they dry), and hang upside down in a dark, airy closet—because nobody wants sun-bleached potpourri. Deadhead weekly and many varieties will throw a second, lighter flush in September like an encore at a summer concert.
Stage 6: Post-Bloom Care & Maintenance
After the final curtain call, give the plant a “green haircut,” removing roughly one-third of overall height but never slicing into the leafless, woody base—old wood doesn’t resprout, a botanical fact confirmed by every lavender society from Washington to Warwickshire. Shape it into a tidy dome so winter rains shed like water off a duck’s back. In zones 6 and below, skip fall fertilizer; you want the plant to harden off, not party. Instead, mound 2 inches of pea gravel or light bark around the crown once soil temps drop below 50 °F (10 °C). Container plants can overwinter in an unheated garage; water them monthly—just enough so the roots don’t desiccate—then re-acclimate to full sun in early spring.
Troubleshooting Common Problems in Lavender Growth
Yellow leaves? Check your watering frequency—roots hate wet socks more than teenagers do. No blooms? Either the spot is too shady or you’ve been too kind with nitrogen; think “tough love.” Leggy seedlings stretching like they’re doing yoga usually crave more light; lower your LED to 4 inches above foliage. Aphids can be blasted off with a hose set to “rain” or dispatched with a spritz of 1% horticultural soap. Root rot smells like forgotten gym laundry; if you catch it early, slice away blackened roots, dust with cinnamon (a natural fungicide), and repot in sterile mix. Winter dieback happens when icy wind meets wet soil—prevention beats resurrection, so elevate pots on pot feet and keep that drainage ruthless.
Frequently Asked Questions (FAQ)
How long does it take for lavender to grow from seed to bloom? Typically 4–5 months if you start indoors; from direct-sown seed outdoors, expect the following summer.
Do lavender seeds need cold stratification? Yes, 3–4 weeks in the fridge in barely damp medium boosts germination from 30% to 80%.
Why are my lavender seedlings leggy and falling over? Insufficient light and/or too much heat without airflow. Lower your grow light and aim a gentle fan at them.
What is the best soil mix for lavender in pots? Equal parts quality potting soil, coarse perlite, and horticultural grit; the mix should sound like a maraca when you shake it.
How often should I water my lavender plant? Water deeply, then allow the top 2 inches to dry; in pots that’s usually every 7–10 days, in the ground every 10–14 days—adjust for rainfall.
Why is my lavender not flowering? Too little sun, excess nitrogen, or pruning at the wrong time (never cut back in fall if you want spring flowers).
How and when should I prune my lavender? Give a light trim right after first bloom, then a harder—but never woody—cut in late summer, shaping the plant into a sphere.
Is lavender a perennial in my climate zone? English lavender is reliably perennial to zone 5; protect with gravel mulch and excellent drainage. In zone 4, grow in pots and overwinter indoors.
Conclusion: Enjoying the Fruits of Your Labor
From the first skeptical sprout to the final cloud of purple buzzing with bees, the growing stages of lavender: from seed to full bloom are a masterclass in patience and payoff. You’ll learn to read the weather like a farmer, to under-water like a reformed plant killer, and to bury your nose in a bouquet you coaxed from dust. Dry the bundles, steep the buds in sugar for shortbread, or just leave the stems in a jar so every time you walk past you get a free trip to Provence. However you use it, the real harvest is the confidence that comes from turning a seed the size of a punctuation mark into a garden celebrity. Keep notes, keep pruning shears handy, and keep sniffing—because lavender, like all good things, rewards the quietly observant.
References & Further Reading
Deepen your lavender lore with the Royal Horticultural Society’s growing guide, tap your local UC Master Gardener helpline for climate-specific advice, or browse the U.S. Lavender Association’s resources for farm-scale tips that scale down beautifully to backyard plots.